📝Arduino vs ESP32 (Which should you buy in 2026?)
Arduino Uno R3 and the classic ESP32-WROOM-32 DevKit V1 Comparison.

title: "Arduino vs ESP32: Which Development Board Should You Buy in 2026?" description: "Arduino Uno R3 vs ESP32 explained for beginners. Compare Wi-Fi, Bluetooth, speed, memory, GPIO pins, voltage, programming difficulty, projects, and price." slug: "arduino-vs-esp32" keywords:
- Arduino vs ESP32
- Arduino Uno vs ESP32
- ESP32 for beginners
- best microcontroller board 2026
- Arduino or ESP32
- ESP32 WiFi development board
- Arduino Uno R3 author: "Thinking Robot"
Arduino vs ESP32: Which Development Board Should You Buy in 2026?
Choosing your first microcontroller board can be confusing.
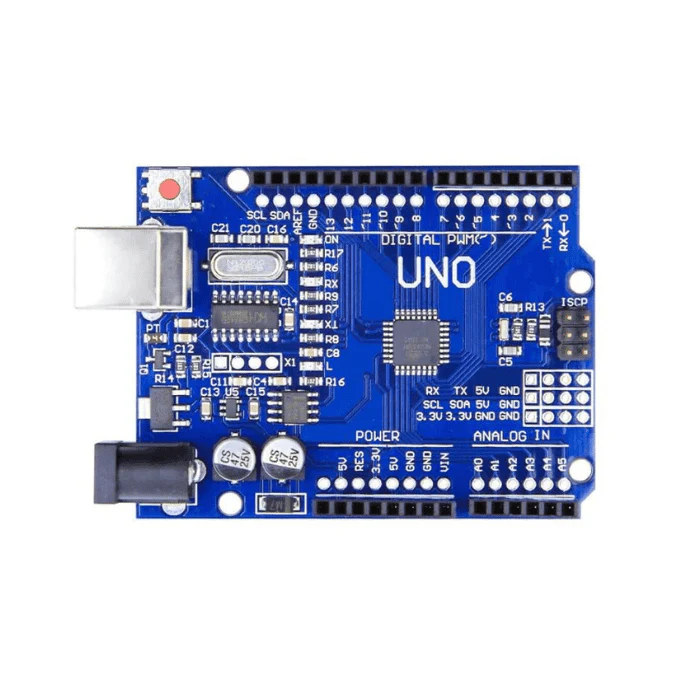
The Arduino Uno R3 has been one of the most popular boards for learning electronics, programming, sensors, motors, and embedded systems. The ESP32, meanwhile, offers significantly more processing power, memory, GPIO options, built-in Wi-Fi, and Bluetooth—often at a surprisingly affordable price.
So, should you buy an Arduino Uno or an ESP32 in 2026?
For most new IoT and wireless projects, the ESP32 is the better overall choice. However, the Arduino Uno remains an excellent learning board for beginners who want simplicity, strong 5V compatibility, and an enormous collection of beginner-friendly tutorials.
This guide compares the Arduino Uno R3 with the commonly available ESP32-WROOM-32 DevKit V1.
Quick recommendation
- Choose Arduino Uno R3 for basic electronics, classroom learning, simple sensor projects, and maximum beginner-friendliness.
- Choose ESP32 for IoT, Wi-Fi, Bluetooth, mobile control, web servers, automation, data logging, and more advanced projects.
Quick Answer: Arduino or ESP32?
| Your requirement | Recommended board |
|---|---|
| First-ever electronics project | Arduino Uno |
| Basic LED, buzzer, and sensor experiments | Arduino Uno |
| Wi-Fi or internet connectivity | ESP32 |
| Bluetooth control | ESP32 |
| IoT and smart-home projects | ESP32 |
| More processing power | ESP32 |
| Direct compatibility with many 5V modules | Arduino Uno |
| More memory for larger programs | ESP32 |
| Battery-powered wireless sensor | ESP32 |
| Simple classroom demonstrations | Arduino Uno |
| Mobile-controlled robot | ESP32 |
| Running several tasks together | ESP32 |
For a modern learner who wants to progress into IoT, robotics, or wireless automation, the ESP32 provides more room to grow.
What Is an Arduino Uno?
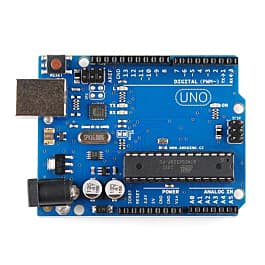
The Arduino Uno R3 is a microcontroller development board based on the ATmega328P, an 8-bit AVR microcontroller.
It is widely used to teach:
- Basic programming
- Digital inputs and outputs
- Analog sensor readings
- PWM control
- Motor control
- Serial communication
- Electronic circuit prototyping
The Uno has a simple layout, clearly labelled pins, a large USB connector, and a barrel-jack power input. Its popularity has also created an enormous ecosystem of tutorials, shields, libraries, and example projects.
View the Arduino Uno R3 Development Board on Thinking Robot
Arduino Uno R3 key specifications
- Microcontroller: ATmega328P
- Architecture: 8-bit AVR
- Clock speed: 16 MHz
- Operating logic voltage: 5V
- Digital I/O pins: 14
- PWM-capable pins: 6
- Analog input pins: 6
- Flash memory: 32 KB
- SRAM: 2 KB
- EEPROM: 1 KB
- Built-in Wi-Fi: No
- Built-in Bluetooth: No
- USB programming: Yes
- Recommended external input: 7V to 12V
You can check the complete specifications in the official Arduino Uno R3 documentation.
What Is an ESP32?
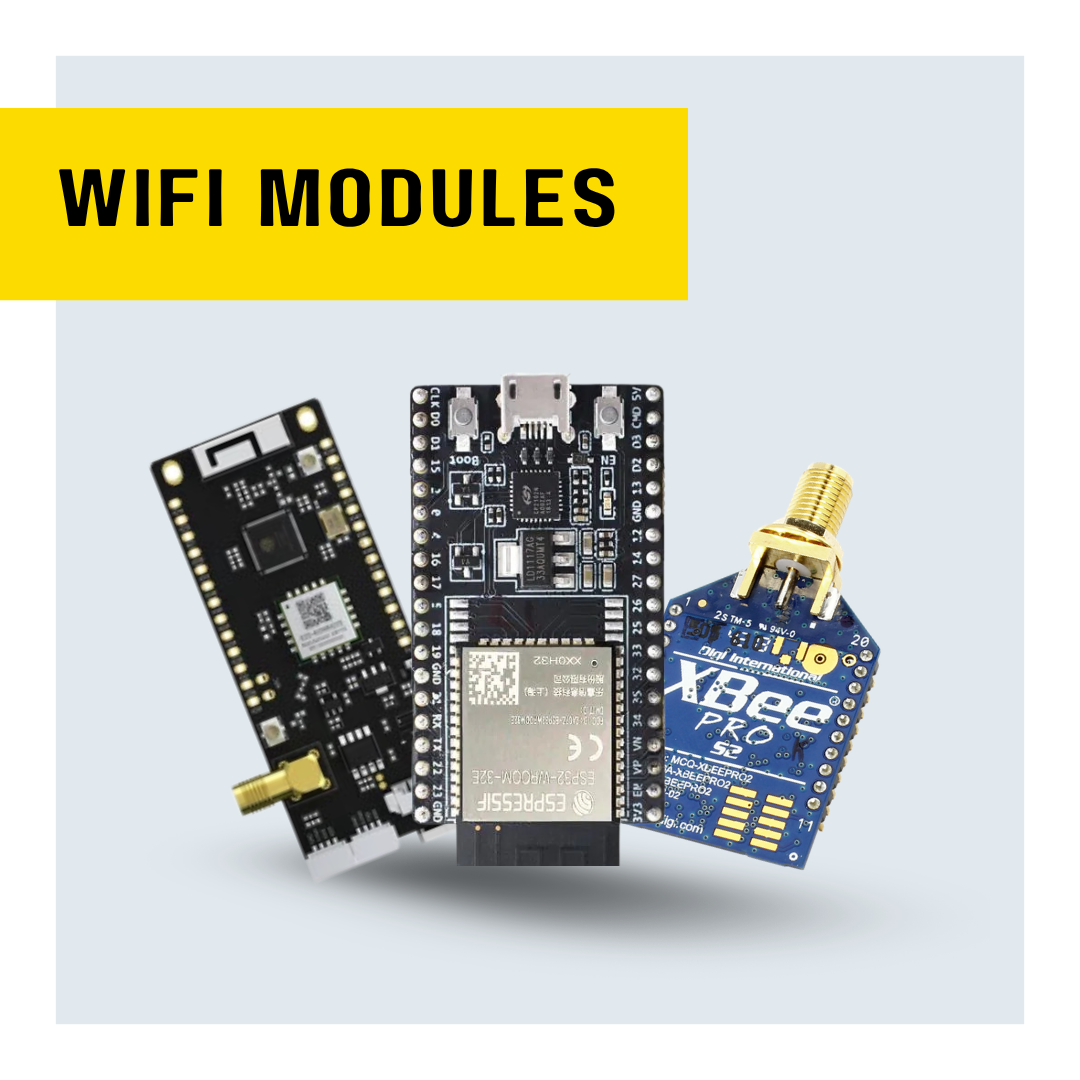
The ESP32 is a family of powerful microcontrollers developed by Espressif Systems.
The commonly used ESP32-WROOM-32 DevKit V1 combines a microcontroller, Wi-Fi, Bluetooth, flash storage, antenna, voltage regulation, and USB programming circuitry on one compact development board.
Unlike the Arduino Uno, you do not usually need a separate communication module to connect an ESP32 project to Wi-Fi or Bluetooth.
View the ESP32-WROOM-32 DevKit V1 on Thinking Robot
Classic ESP32-WROOM-32 key specifications
- Processor: 32-bit Xtensa LX6
- CPU configuration: Dual-core on commonly used ESP32-WROOM-32 boards
- Maximum clock speed: Up to 240 MHz
- Operating logic voltage: 3.3V
- SRAM: Approximately 520 KB on the ESP32 SoC
- Flash memory: Commonly 4 MB on DevKit boards
- Wi-Fi: 2.4 GHz 802.11 b/g/n
- Bluetooth: Bluetooth Classic and Bluetooth Low Energy
- Digital GPIO: Board-dependent; many pins are available
- ADC: 12-bit ADC
- DAC: Two 8-bit DAC channels on the classic ESP32
- Touch inputs: Supported on selected pins
- PWM: Available through multiple GPIO pins
- Communication: UART, I²C, SPI, I²S and more
- Low-power modes: Supported
- USB programming: Yes, through the board's USB-to-serial interface
For deeper technical information, refer to the official Espressif ESP32 documentation and the ESP32-WROOM-32 datasheet.
Important: ESP32 is a large family. Specifications differ between the original ESP32, ESP32-C3, ESP32-S3, ESP32-C6 and other variants. This article primarily discusses the classic ESP32-WROOM-32 DevKit V1.
Arduino Uno vs ESP32: Complete Comparison
| Feature | Arduino Uno R3 | ESP32-WROOM-32 DevKit V1 |
|---|---|---|
| Microcontroller | ATmega328P | ESP32 |
| Architecture | 8-bit AVR | 32-bit Xtensa LX6 |
| CPU cores | Single-core | Commonly dual-core |
| Clock speed | 16 MHz | Up to 240 MHz |
| Operating logic | 5V | 3.3V |
| Flash memory | 32 KB | Commonly 4 MB on DevKit boards |
| SRAM | 2 KB | Approximately 520 KB |
| EEPROM | 1 KB | No traditional EEPROM; flash emulation can be used |
| Wi-Fi | No | Built in |
| Bluetooth | No | Built in |
| Digital I/O | 14 | Board and pin configuration dependent |
| Analog input | 6 channels | Multiple channels; exact availability depends on board and Wi-Fi usage |
| ADC resolution | 10-bit | 12-bit |
| DAC output | No true DAC | Two channels on classic ESP32 |
| Capacitive touch | No | Yes, on selected pins |
| PWM | 6 hardware-labelled PWM pins | Flexible PWM through multiple GPIO pins |
| Hardware serial | 1 UART | Multiple UART controllers |
| Multitasking | Very limited | FreeRTOS-based multitasking supported |
| Low-power modes | Basic sleep options | Multiple advanced sleep modes |
| Learning difficulty | Easier | Slightly more complex |
| Best for | Basic electronics | IoT and advanced embedded projects |
1. Processing Power
The difference in processing capability is substantial.
The Arduino Uno runs at 16 MHz, while the classic ESP32 can run at up to 240 MHz. The commonly used ESP32-WROOM-32 also provides two processor cores.
This does not mean that every ESP32 project will run exactly 15 times faster. Real-world performance depends on the program, libraries, wireless activity, peripherals, and task design.
However, the ESP32 can comfortably handle workloads that would be difficult or impossible on an Uno, including:
- Hosting a web server
- Maintaining a Wi-Fi connection
- Communicating with cloud services
- Reading several sensors
- Updating a display
- Handling Bluetooth communication
- Running multiple software tasks
- Processing larger amounts of data
Winner: ESP32
For basic LED blinking and sensor reading, both are sufficient. For larger, connected, or multitasking applications, the ESP32 is substantially more capable.
2. Memory
Memory is one of the biggest practical limitations of the Arduino Uno.
The Uno offers:
- 32 KB flash memory
- 2 KB SRAM
- 1 KB EEPROM
Two kilobytes of SRAM can fill quickly when you use:
- Long text strings
- Large arrays
- Displays
- Communication buffers
- JSON data
- Multiple libraries
The ESP32 provides vastly more working memory and commonly includes around 4 MB of external flash on development boards.
That additional memory is useful for:
- Web pages
- Wi-Fi libraries
- Bluetooth applications
- JSON parsing
- Cloud APIs
- Over-the-air firmware updates
- Larger graphics
- More complex program structures
Winner: ESP32
The Uno's limited memory encourages efficient programming, but the ESP32 gives developers considerably more flexibility.
3. Wi-Fi and Bluetooth
This is the most important difference for IoT projects.
The Arduino Uno R3 does not include Wi-Fi or Bluetooth. To add wireless connectivity, you need an external module or shield, such as:
- ESP8266 module
- Bluetooth HC-05 module
- Wi-Fi shield
- Ethernet shield
That means additional cost, wiring, power requirements, libraries, and troubleshooting.
The ESP32 includes:
- 2.4 GHz Wi-Fi
- Bluetooth Classic on the classic ESP32
- Bluetooth Low Energy
You can use an ESP32 to build:
- Mobile-controlled robots
- Wi-Fi sensor dashboards
- Smart switches
- Home-automation devices
- Wireless weather stations
- Bluetooth controllers
- Cloud-connected monitoring systems
- Local web-server projects
Winner: ESP32
For any project requiring wireless connectivity, the ESP32 is usually the more practical choice.
4. Operating Voltage: 5V vs 3.3V
The Arduino Uno uses 5V logic, while the ESP32 uses 3.3V logic.
This matters when connecting sensors, displays, relays, and communication modules.
Arduino Uno advantage
Many traditional Arduino modules are designed around 5V systems. They may work more naturally with the Uno without requiring voltage-level conversion.
Examples include certain:
- Relay modules
- Character LCD modules
- Ultrasonic sensors
- Older sensor boards
- 5V logic circuits
ESP32 limitation
ESP32 GPIO pins are not generally 5V-tolerant. Applying 5V directly to an ESP32 input can damage the microcontroller.
When connecting a 5V output to an ESP32 input, you may need:
- A resistor voltage divider
- A logic-level converter
- A transistor interface
- A correctly designed module with 3.3V-compatible outputs
Winner: Arduino Uno for simple 5V interfacing
The ESP32 remains more powerful, but beginners must pay closer attention to voltage compatibility.
Never assume that a module is safe for 3.3V logic simply because its power pin can accept 5V. Check the output signal voltage separately.
5. GPIO Pins and Peripheral Support
The Arduino Uno has a simple and predictable pin arrangement:
- 14 digital pins
- 6 analog inputs
- 6 PWM-capable pins
This straightforward design makes it easier for beginners to understand.
The ESP32 offers more flexible peripherals and generally more usable connections, including:
- Digital input and output
- Analog input
- PWM
- Capacitive touch
- UART
- I²C
- SPI
- I²S
- DAC on the classic ESP32
However, ESP32 pin selection requires more care.
Some ESP32 pins:
- Are used during startup
- Affect boot mode
- Are input-only
- Are connected internally to flash memory
- May produce signals during boot
- May not be exposed on every development board
Winner: ESP32 for capability
Winner: Arduino Uno for simplicity
Before finalising an ESP32 circuit, always verify the pinout for your exact development board.
6. Analog Inputs
The Arduino Uno contains a straightforward 10-bit ADC.
A 10-bit ADC normally maps an analog input into values from:
0 to 1023
The ESP32 offers a 12-bit ADC, normally producing values from:
0 to 4095
On paper, this gives the ESP32 better resolution. In practice, the classic ESP32 ADC is less linear and can require calibration for accurate voltage measurement.
Another important ESP32 limitation is that some ADC pins associated with ADC2 may become unavailable or restricted while Wi-Fi is active.
Which is better?
- Choose the Arduino Uno for simple, predictable classroom analog experiments.
- Choose the ESP32 when you need more channels, greater nominal resolution, or wireless data transmission.
- For precision measurement, consider using a dedicated external ADC with either board.
Result: It depends on the application
7. Programming and Development Environment
Both boards can be programmed using the Arduino IDE.
A basic Arduino-style program looks similar on both:
void setup() {
  pinMode(2, OUTPUT);
}

void loop() {
  digitalWrite(2, HIGH);
  delay(1000);

  digitalWrite(2, LOW);
  delay(1000);
}
This makes the transition from Arduino Uno to ESP32 relatively easy.
Arduino Uno setup
The Uno is generally recognised directly by the Arduino IDE. You select the board and port, then upload your program.
ESP32 setup
To program an ESP32 through Arduino IDE, you must install the Espressif ESP32 board package. Some boards may also require a USB-to-serial driver.
Depending on the development board, you might occasionally need to hold the BOOT button while uploading.
Winner: Arduino Uno
The Uno provides a slightly smoother first experience, but ESP32 setup is still manageable for beginners.
8. Libraries and Community Support
The Arduino Uno has an enormous collection of:
- Tutorials
- Example projects
- Books
- YouTube videos
- Shields
- Libraries
- Classroom resources
- Troubleshooting discussions
The ESP32 also has a very large and active ecosystem. It supports many Arduino libraries, although not every library written for AVR-based Arduino boards will work without modification.
Common compatibility issues include:
- AVR-specific register operations
- Assumptions about 5V logic
- Processor-specific timing
- Architecture-specific libraries
- Different interrupt behaviour
- Different analog and PWM APIs
Winner for absolute beginners: Arduino Uno
Winner for modern IoT development: ESP32
9. Multitasking
An Arduino Uno normally executes one main program loop. You can simulate multiple activities using careful timing, interrupts, and state machines, but resources are limited.
The ESP32 runs FreeRTOS, allowing software tasks to be scheduled separately.
For example, an ESP32 can manage:
- One task for sensor readings
- One task for Wi-Fi communication
- One task for a display
- One task for button handling
This is especially useful in robotics, IoT gateways, monitoring systems, and automation devices.
Winner: ESP32
Beginners do not need to use FreeRTOS immediately. Standard Arduino-style setup() and loop() programs work on ESP32 too.
10. Power Consumption
The answer here is more nuanced.
A basic Arduino Uno can consume less power than an ESP32 when the ESP32's wireless radio is active. However, the standard Uno development board is not designed as an ultra-low-power platform because its regulator, USB interface, and indicator LEDs continue drawing power.
The ESP32 can consume more current during Wi-Fi transmission, but it also supports advanced power-saving modes such as:
- Modem sleep
- Light sleep
- Deep sleep
Deep sleep makes the ESP32 useful for battery-powered sensors that wake periodically, collect data, transmit it, and return to sleep.
Better for simple continuously powered circuits: Arduino Uno
Better for optimised wireless battery projects: ESP32
The final result depends heavily on board design, firmware, regulator efficiency, sensor consumption, and how frequently wireless communication is used.
11. Price and Overall Value
Board prices vary based on:
- Original versus compatible board
- USB interface
- Flash capacity
- Connector type
- Manufacturer
- Seller
- Included accessories
The ESP32 often provides exceptional value because Wi-Fi and Bluetooth are already included.
With an Arduino Uno, adding separate wireless modules may increase the complete project cost and circuit complexity.
Check the latest prices here:
Winner: ESP32 for features per rupee
Winner: Arduino Uno for a simple first learning board
Project Comparison
Projects well suited to Arduino Uno
The Arduino Uno is excellent for:
- LED and traffic-light projects
- Automatic street-light models
- Basic obstacle-avoiding robots
- Temperature displays
- Line-following robots
- Ultrasonic distance measurement
- Servo-motor control
- Basic relay automation
- Electronic dice
- Classroom science models
Projects well suited to ESP32
The ESP32 is ideal for:
- IoT weather stations
- Wi-Fi home automation
- Bluetooth-controlled robots
- Smart irrigation systems
- Online temperature monitoring
- Mobile-controlled lighting
- Wireless security systems
- Cloud-connected energy monitoring
- ESP32 web servers
- MQTT-based automation
- Wireless sensor networks
- Smart displays
- Over-the-air firmware updates
- Remote appliance control
Example: Connecting an OLED Display
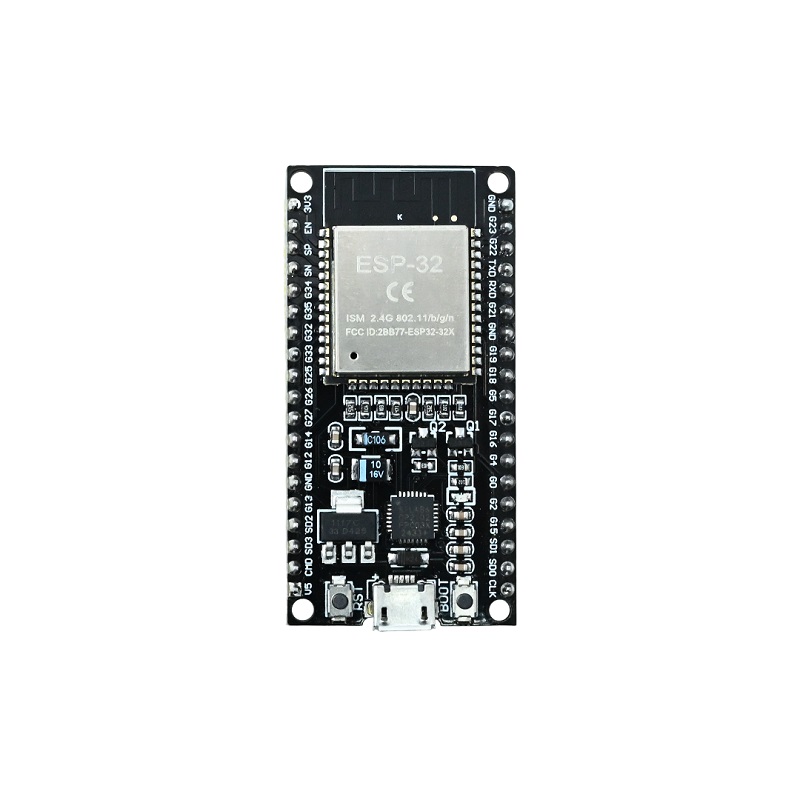
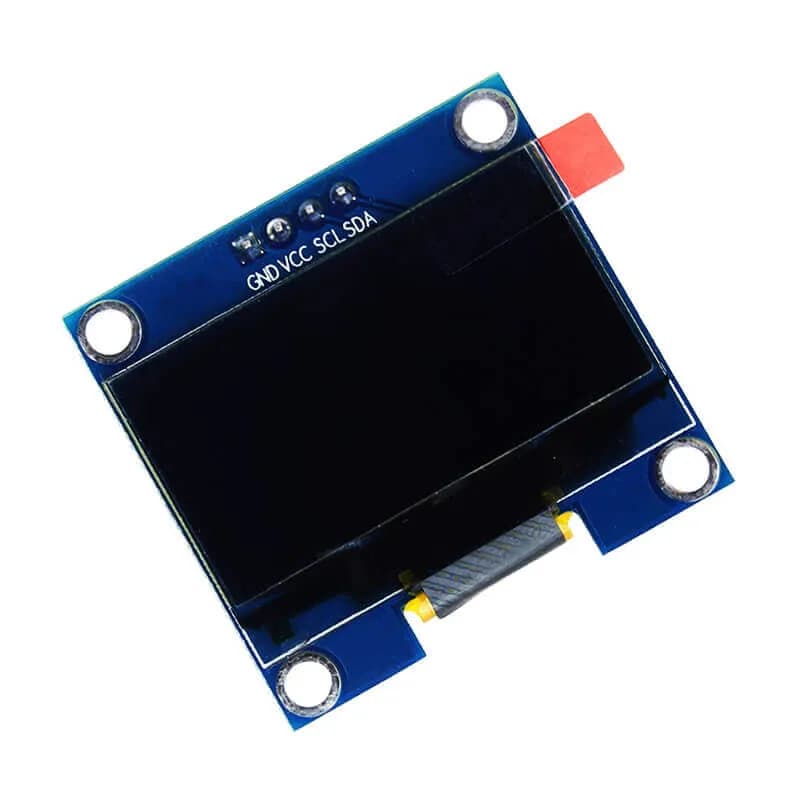
A small OLED display is a useful addition to both Arduino and ESP32 projects.
The popular 0.96-inch SSD1306 OLED uses I²C communication, so it normally requires only four main connections:
- VCC
- GND
- SDA
- SCL
View the 0.96-inch I²C OLED Display on Thinking Robot
Typical Arduino Uno I²C connections
| OLED pin | Arduino Uno |
|---|---|
| VCC | Check module rating; commonly 5V or 3.3V |
| GND | GND |
| SDA | A4 |
| SCL | A5 |
Typical ESP32 I²C connections
| OLED pin | ESP32 DevKit |
|---|---|
| VCC | Usually 3.3V; verify your module |
| GND | GND |
| SDA | GPIO 21 by common convention |
| SCL | GPIO 22 by common convention |
ESP32 I²C pins can usually be reassigned in software, but GPIO 21 and GPIO 22 are common defaults on classic ESP32 development boards.
Which Board Is Better for Complete Beginners?
The Arduino Uno is still one of the easiest boards for learning the fundamentals.
Its advantages include:
- Simple pin layout
- Easy USB programming
- 5V logic
- Extensive beginner documentation
- Fewer boot-pin complications
- Easy breadboard and module experimentation
- Large classroom ecosystem
Choose Arduino Uno when your main goal is to understand:
- Variables
- Conditions
- Loops
- Digital input and output
- Analog readings
- PWM
- Sensors
- Motors
- Basic serial communication
Once these fundamentals are clear, moving to ESP32 becomes easier.
Is ESP32 Too Difficult for a Beginner?
No. A beginner can start directly with ESP32.
You can initially ignore its advanced capabilities and use it like a basic Arduino board:
- Blink an LED.
- Read a push button.
- Connect an LDR.
- Read a temperature sensor.
- Control a relay.
- Connect an OLED.
- Add Wi-Fi.
- Build a web dashboard.
- Connect the project to a cloud platform.
The main precautions are:
- Use correct GPIO pins.
- Remember that ESP32 logic is 3.3V.
- Avoid sending 5V into GPIO pins.
- Verify the pinout for your exact board.
- Use a stable USB cable and power source.
- Understand that some pins affect the boot process.
If you are comfortable following pin diagrams and tutorials carefully, the ESP32 is a suitable first board.
Which Board Is Better for IoT?
The ESP32 wins this category clearly.
An IoT device normally needs one or more of the following:
- Wi-Fi
- Bluetooth
- Cloud connectivity
- MQTT
- HTTP requests
- Remote monitoring
- Mobile control
- Wireless firmware updates
- Web dashboards
- Multiple sensors
- Local automation
The ESP32 provides the processing power, memory, and connectivity needed for these applications in one board.
The Arduino Uno can participate in an IoT system, but it normally requires additional communication hardware.
Recommended option for learning IoT
The Thinking Robot ESP32 IoT Starter Kit is designed for beginners who want to learn ESP32, sensors, displays, relays, wireless communication, and practical IoT development through hands-on projects.
Instead of purchasing every component separately, a complete kit gives you compatible parts to start experimenting immediately.
Which Board Is Better for Robotics?
The answer depends on the robot.
Choose Arduino Uno for:
- A basic line follower
- A simple obstacle-avoiding robot
- A servo-based mechanism
- A classroom robotics model
- A robot without wireless control
Choose ESP32 for:
- A Bluetooth-controlled robot
- A Wi-Fi-controlled robot
- A robot controlled from a mobile browser
- A robot that sends sensor data wirelessly
- A robot requiring several concurrent tasks
- A robot using remote telemetry
- A robot that needs more memory and processing power
Overall winner for modern robotics: ESP32
The Uno remains easier for simple motor-control lessons, but the ESP32 gives you more options for expansion.
Can Arduino Uno and ESP32 Be Used Together?
Yes.
In some systems, an Arduino Uno or another microcontroller handles direct hardware control while the ESP32 manages wireless communication.
They can communicate through:
- UART
- I²C
- SPI
However, a voltage-level difference must be considered because the Uno uses 5V logic and the ESP32 uses 3.3V logic.
For many beginner projects, using both boards is unnecessary. The ESP32 alone can often handle the sensors, control logic, and wireless communication.
A dual-controller design becomes useful when:
- Hardware tasks must remain isolated
- Strict timing is required
- Additional I/O is needed
- You are upgrading an existing Arduino system
- Communication and control responsibilities must be separated
- Fail-safe behaviour requires independent controllers
Arduino Uno Advantages and Disadvantages
Advantages
- Very beginner-friendly
- Simple pin arrangement
- Strong learning ecosystem
- Uses 5V logic
- Easy to troubleshoot
- Large number of compatible modules
- Excellent for teaching programming fundamentals
- Replaceable ATmega328P on the standard DIP version
Disadvantages
- No built-in Wi-Fi
- No built-in Bluetooth
- Limited processing power
- Very limited SRAM
- Limited flash storage
- Fewer advanced peripherals
- Additional modules are needed for IoT
- Larger connected projects can quickly exceed its resources
ESP32 Advantages and Disadvantages
Advantages
- Built-in Wi-Fi
- Built-in Bluetooth
- Much faster processor
- Significantly more memory
- Commonly available at an affordable price
- More GPIO and peripheral flexibility
- Supports capacitive touch
- Includes DAC on classic models
- Supports multitasking
- Supports deep sleep
- Excellent for IoT and wireless projects
- Supports over-the-air firmware updates
Disadvantages
- Uses 3.3V logic
- GPIO selection can confuse beginners
- Some pins affect boot behaviour
- ADC performance may require calibration
- Different ESP32 variants have different features
- Some older Arduino libraries are not fully compatible
- Wi-Fi can affect the availability of certain ADC resources
- Development-board quality varies between manufacturers
Final Verdict: Arduino or ESP32 in 2026?
Buy an Arduino Uno R3 if:
- You are completely new to electronics.
- You want the simplest possible learning experience.
- You mainly want to control LEDs, motors, buzzers, and basic sensors.
- You are following an Arduino-specific course.
- Your modules depend on 5V logic.
- You do not currently need Wi-Fi or Bluetooth.
- You want a board for classroom demonstrations.
Buy an ESP32 if:
- You want to learn IoT.
- You need Wi-Fi or Bluetooth.
- You want to build app-controlled projects.
- You need more memory and processing power.
- You want to create home-automation systems.
- You want to send sensor data to the internet.
- You plan to build more advanced projects later.
- You want stronger features for the price.
Our recommendation
For someone purchasing only one board in 2026, we recommend the ESP32 for most use cases.
It can perform basic Arduino-style experiments while also providing a clear path toward:
- IoT
- Robotics
- Bluetooth
- Web servers
- Cloud platforms
- Smart-home automation
- Wireless sensor networks
The Arduino Uno remains an excellent board for structured learning, particularly where simplicity and 5V interfacing are more important than wireless features.
Frequently Asked Questions
Is ESP32 better than Arduino?
The ESP32 is more powerful and includes Wi-Fi and Bluetooth, but “better” depends on the project. The Arduino Uno can be easier for basic electronics and 5V interfacing.
Can ESP32 run Arduino code?
ESP32 supports the Arduino programming framework, and many Arduino sketches work with small changes. Hardware-specific code and AVR-only libraries may need modification.
Can I program ESP32 using Arduino IDE?
Yes. Install the ESP32 board package in Arduino IDE, select your board and port, and upload the program through USB.
Is ESP32 good for beginners?
Yes. Beginners can start with basic digital and analog projects before moving into Wi-Fi, Bluetooth, web servers, and cloud connectivity.
Does Arduino Uno have Wi-Fi?
The standard Arduino Uno R3 does not have built-in Wi-Fi. You need an external Wi-Fi module or shield.
Does ESP32 work with 5V sensors?
Some modules powered by 5V can work with the ESP32, but their signal outputs must be compatible with 3.3V logic. Never connect an unchecked 5V output directly to an ESP32 GPIO.
Which board is better for a smart-home project?
The ESP32 is generally better because Wi-Fi and Bluetooth are integrated and it has sufficient memory for networking, cloud communication, scheduling, dashboards, and automation logic.
Which board is better for a line-following robot?
Both can work. Arduino Uno is simpler for a basic robot, while ESP32 is better if you want Bluetooth control, Wi-Fi telemetry, or more advanced behaviour.
Does ESP32 have analog output?
The classic ESP32 includes two 8-bit DAC channels. However, newer ESP32-family chips may have different peripheral configurations, so check the datasheet for your exact model.
Should I learn Arduino before ESP32?
It is helpful but not compulsory. Arduino-style programming can be learned directly on an ESP32. Starting with the Uno may make hardware fundamentals easier, while starting with ESP32 reduces the need to buy another board when you begin IoT projects.
Start Building with Thinking Robot
Whether you choose Arduino Uno or ESP32, the best way to learn electronics is by building real projects.
Explore:
- Arduino Uno R3 Development Board
- ESP32-WROOM-32 DevKit V1
- ESP32 IoT Starter Kit
- 0.96-inch SSD1306 OLED Display
The Arduino Uno is an excellent place to understand electronics.
The ESP32 is an excellent place to build the connected projects of the future.
Official References
- Arduino Uno R3 Documentation
- Arduino Uno R3 Datasheet
- Espressif ESP32 Product Documentation
- ESP32-WROOM-32 Datasheet
- ESP32 DevKitC Documentation
Specifications can vary across compatible development boards and ESP32 variants. Always check the pinout, regulator, flash capacity, USB interface, and datasheet of the exact board being used.