How to Solder Electronics: A Step-by-Step Beginner's Guide
Learn how to solder electronics safely and effectively with this step-by-step guide covering essential tools, proper technique, safety tips, and how to fix common soldering mistakes.

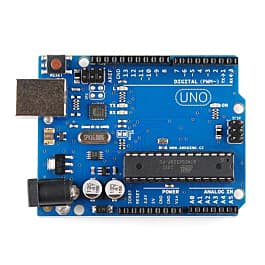
Soldering is one of the most fundamental skills in electronics. Whether you are assembling a custom circuit board, repairing a broken wire, building an Arduino project, or modifying hardware, knowing how to create clean, reliable solder joints is essential.
At first glance, soldering can seem intimidating. Working with high temperatures and hot metal requires care, but the underlying process is straightforward once you understand the basic mechanics. This guide explains everything you need to know to start soldering electronics confidently, safely, and correctly.
What Is Soldering?
Soldering is a process in which two or more metal items are joined together by melting a filler metal—known as solder—into the joint. The filler metal has a lower melting point than the components being joined. When the solder cools, it solidifies to create a strong mechanical bond and a reliable electrical connection.
Unlike welding, where the base metals themselves melt and fuse together, soldering melts only the solder material. The base metals—such as copper pads on a printed circuit board (PCB) or the wire leads of a resistor—remain solid throughout the process.
Essential Soldering Tools and Materials
Before heating up a soldering iron, you need to gather the correct tools. Working with quality tools makes learning significantly easier and helps avoid common mistakes.
1. Soldering Iron
The soldering iron provides the heat needed to melt solder. For beginner electronics projects, a temperature-controlled soldering station or an adjustable soldering iron with a power rating between 40W and 60W is recommended. Avoid simple non-adjustable irons if possible, as they can run either too cold or hot enough to damage delicate components.
2. Solder
Solder is available in two main categories:
- Leaded Solder (60/40 or 63/37): A blend of tin and lead. It melts at a lower temperature (around 183°C / 361°F) and flows easily, making it forgiving for beginners. However, lead poses health and environmental risks, so proper hygiene and ventilation are required.
- Lead-Free Solder (SAC305 or Tin/Copper): Safer for health and the environment, but melts at a higher temperature (around 217°C to 227°C / 422°F to 440°F) and requires slightly more technique to produce shiny joints.
Most electronics solder features a rosin core (flux embedded inside the wire), which cleans oxidation automatically during soldering.
3. Rosin Flux
Flux is a chemical cleaning agent that removes oxidation from metal surfaces when heated. Even if your solder wire has a rosin core, keeping a flux pen or paste nearby ensures smooth heat transfer and liquid metal flow.
4. Brass Sponge and Wet Sponge
A tip cleaner is essential for keeping the iron tip clean. A brass wire sponge is preferred because it cleans oxidation without lowering the tip's temperature. A traditional damp cellulose sponge works well for wiping off excess solder.
5. Desoldering Pump and Braid
Mistakes happen, especially when learning. A desoldering pump (solder sucker) uses vacuum suction to remove molten solder, while desoldering braid (wick) absorbs molten solder through capillary action.
| Tool / Material | Recommended Type | Purpose |
|---|---|---|
| Soldering Iron | Variable temperature (40W–60W) | Supplies controlled heat to the joint |
| Solder Wire | Rosin-core (0.8mm diameter) | Creates the electrical and mechanical bond |
| Flux | Rosin flux pen or paste | Removes oxidation and improves solder flow |
| Tip Cleaner | Brass wire sponge | Cleans oxide build-up off the iron tip |
| Desoldering Wick | Copper braid | Removes excess or incorrect solder joints |
Safety Guidelines for Soldering
Safety should always come first when working with high-temperature tools and fumes.
- Wear Eye Protection: Always wear safety glasses. Molten solder or snapping component leads can flick into your eyes.
- Work in a Well-Ventilated Area: Soldering creates fumes from burning flux. Use a solder fume extractor or work near an open window with a fan.
- Never Touch the Barrel or Tip: A soldering iron reaches temperatures over 350°C (660°F). Always return the iron to a secure stand when not in hand.
- Wash Your Hands After Soldering: Wash your hands thoroughly with soap and water after handling solder, especially if using leaded solder.
- Keep Fire Safety in Mind: Place your soldering stand on a heat-resistant surface away from flammable materials.
Step-by-Step Guide: How to Solder Through-Hole Components
Through-hole soldering is the standard starting point for beginners. It involves inserting component leads through drilled holes on a circuit board and soldering them to copper pads on the underside.
Step 1: Prepare Your Workspace and Equipment
Set up your tools on a clean surface. Plug in your soldering iron and set the temperature based on the solder type:
- Leaded Solder: 315°C to 345°C (600°F to 650°F)
- Lead-Free Solder: 350°C to 380°C (660°F to 715°F)
Insert your electronic component (such as a resistor or LED) through the designated holes on the top side of the PCB. On the underside, bend the leads outward at roughly a 45-degree angle. This holds the component securely in place while you turn the board over.
Step 2: Clean and Tin the Soldering Tip
Before every joint, wipe the iron tip in your brass sponge. Once clean, apply a tiny dab of fresh solder directly to the tip. This process is called tinning. Tinning protects the tip from oxidation and aids in heat transfer between the iron and the workpiece.
Step 3: Heat the Joint (Not the Solder)
Position the tip of the soldering iron so that it touches both the component lead and the PCB copper pad simultaneously.
Crucial Rule: Heat the metal workpieces first, not the solder directly.
Hold the tip firmly in position for approximately 2 to 3 seconds. Heating both surfaces ensures the molten solder will flow evenly over both parts.
Step 4: Apply the Solder
While holding the iron tip against the joint, touch the solder wire to the opposite side of the joint—where the component lead meets the copper pad.
If the joint is sufficiently heated, the solder will melt smoothly, flow around the lead, and cover the pad. Feed in just enough solder to form a small, smooth cone. Do not press the solder directly against the hot iron tip; allow the heated joint to melt the solder naturally.
Step 5: Remove Solder First, Then the Iron
- Withdraw the solder wire first.
- Hold the soldering iron in place for another half second to allow the solder to settle evenly.
- Remove the soldering iron from the joint.
Keep the circuit board completely still for 3 to 5 seconds while the joint cools and solidifies naturally. Blowing on the joint can cause premature cooling and create structural defects.
Step 6: Trim the Leads
Once the joint has cooled completely, use flush wire cutters to clip the excess component lead just above the top of the solder joint. Always hold the end of the lead while cutting so it does not fly across your workspace.
Identifying Good vs. Bad Solder Joints
Inspecting your work visually is a key skill. A good solder joint relies on proper heat transfer, correct solder volume, and clean surfaces.
What a Good Joint Looks Like
- Concave Cone Shape: The joint should resemble a smooth, shiny miniature volcano tapering up the lead.
- Full Coverage: Solder covers the pad completely and clings tightly to the lead.
- Shiny Surface: Leaded solder yields a glossy mirror finish. Lead-free solder may look slightly duller or semi-satin, but the surface should still look smooth and even.
Common Soldering Defects and Fixes
1. Cold Solder Joint
- Appearance: Dull, grainy, rough, or lumpy surface.
- Cause: The joint was moved before cooling, or the joint was not heated sufficiently before solder was applied.
- Fix: Apply a small drop of liquid flux, place the iron tip on the joint to remelt the solder completely, then allow it to cool undisturbed.
2. Solder Bridge
- Appearance: Solder spills over and connects two adjacent copper pads or pins, creating an unwanted electrical short circuit.
- Cause: Applying too much solder or dragging the iron tip across adjacent leads.
- Fix: Drag the clean iron tip between the pins to pull away the excess, or use a piece of desoldering braid to absorb the extra solder bridging the pins.
3. Overheated Joint / Burned Flux
- Appearance: Burnt brown residue around the joint, peeled copper pads, or brittle solder.
- Cause: Iron left on the joint for too long, or iron temperature set too high.
- Fix: Allow the area to cool, remove burnt flux with isopropyl alcohol and a toothbrush, and re-apply fresh flux and solder.
4. Insufficient Wetting (Starved Joint)
- Appearance: Solder forms a round ball on the lead without bonding to the flat copper pad (or vice versa).
- Cause: Either the pad or the lead was not cleaned, or one part did not receive enough direct heat.
- Fix: Apply flux, reheat both the lead and pad simultaneously with the iron, and add a small amount of new solder.
How to Fix Mistakes (Desoldering)
When a component is placed incorrectly or a solder bridge forms, desoldering allows you to safely remove the solder without damaging the circuit board.
Using a Desoldering Pump (Solder Sucker)
- Push down the plunger of the desoldering pump until it clicks into place.
- Heat the bad solder joint with your iron until the solder melts completely into a liquid pool.
- Bring the nozzle of the pump right next to the iron tip over the liquid solder.
- Press the release button on the pump. The internal spring creates a sudden vacuum, drawing molten solder into the chamber.
- Remove the iron and repeat if trace amounts remain.
Using Desoldering Braid (Solder Wick)
- Lay the copper braid flat against the unwanted solder joint.
- Place the hot iron tip directly on top of the braid, pressing gently.
- Heat transfers through the braid, melting the solder underneath. The copper braid will draw the liquid solder up into its weave.
- Lift both the braid and iron away together. Cut off the used solder-filled end of the braid.
Post-Soldering Clean Up and Iron Care
Good maintenance ensures your tools last longer and your electronic assemblies remain reliable over time.
- Clean Off Flux Residue: Flux is chemically reactive and can attract dust or slowly corrode connections over time. Use high-purity Isopropyl Alcohol (IPA 90%+ ) and a soft bristle brush or cotton swab to scrub away dried flux residue from your circuit board.
- Tin the Tip Before Storage: Before turning off your soldering iron station, apply a fresh coating of solder over the tip. Leave this solder coating intact as the iron cools down. This sacrificial layer prevents oxygen in the air from rusting or oxidizing the metal tip during storage.
Frequently Asked Questions
What is the best temperature for soldering electronics?
For standard electronics using leaded solder (60/40), set your iron between 315°C and 345°C (600°F–650°F). For lead-free solder, set it between 350°C and 380°C (660°F–715°F). Higher temperatures increase oxidation and risk burning the PCB.
Should beginners use leaded or lead-free solder?
Leaded solder (60/40 or 63/37 rosin-core) is significantly easier to learn with because it melts at lower temperatures and flows easily. However, if safety regulations or personal preferences require lead-free solder, choose a thin wire (0.8mm) with a quality flux core.
Why won't solder stick to the tip of my iron?
If solder slips off or rolls into beads on your iron tip, the tip is oxidized or dirty. Clean the tip using a brass wire sponge, apply a dedicated tip tinner/cleaner paste, or re-tin it with flux-core solder while hot.
Summary and Next Steps
Soldering is a practical skill that develops quickly with hands-on experience. By following proper procedures—heating both metals, applying solder to the joint rather than the iron, maintaining a clean tinning layer on your tip, and working safely—you will consistently produce shiny, strong, and electrically sound solder connections.
To practice, purchase an inexpensive through-hole soldering kit or practice board. Work slowly, inspect every completed connection, and clean your tools after every session. As your technique develops, you can move on to complex assemblies, wiring harnesses, and surface-mount electronics.